Every designer has experienced the pain and frustration of spending hours perfecting a design only to have it return from the printer looking nothing like their original vision. From color production to setting the proper margins to finding the right resolution, preparing your design for printing entails more than simply sending your file off to your printer.
Before we jump into how to make your design files print-ready, let’s take a look at what “print-ready” actually means.
What does “Print-ready” Mean?
“Print-ready” refers to any document that has all the specifications necessary to ensure a high resolution printed output without requiring additional changes or alterations. This means that a commercial printer will be able to print a print-ready file as submitted without making adjustments to margins, colors, typefaces, or any other aspect of your design.
How to Get Your Designs Print Ready
There are a number of things designers can (and should!) do before submitting a design in order to ensure that printing goes smoothly. Follow these steps to make sure your design prints perfectly:
1. Proof your work thoroughly
Nothing is more disappointing – or easily avoided – than a perfect print job ruined by a typo or misaligned design element. Thoroughly check your work before you submit it to your printer to ensure there are no spelling or alignment errors, and that important information like emails, websites, and phone numbers are correct.
2. Confirm turnaround times
Before you submit your design, find out how long it will take your printer to start and complete your project. This will help you plan your project timeline and ensure that you can get your print-ready file to your printer with enough time for a second print run in case of any errors.
3. Start with the right size
Create your document in the same size as your printed final product. If you’re designing an 8.5” x 11” flyer, set your image dimensions to 8.5” x 11”. This will increase your file size, but it will also reduce the likelihood of error and help prevent grainy or blurry images.
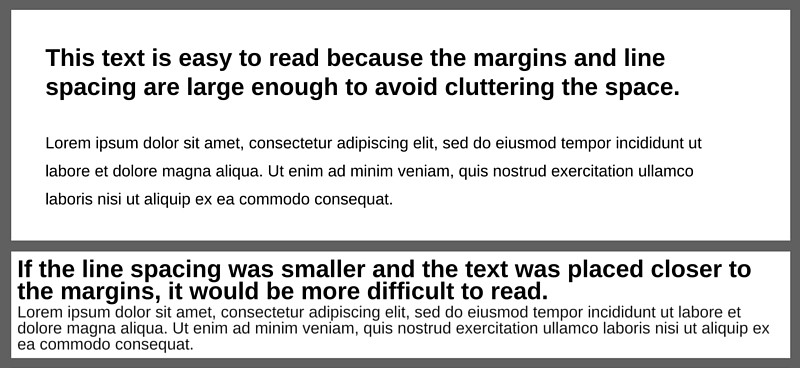
4. Use wide margins
If your margins are too narrow, trimming errors can seem blaringly obvious. On top of that, margins add much-needed white space, which improves the readability and overall aesthetic appeal of your design.
Learn more about white space.
5. Consider folds and binding
If your printed product will be folded or bound, such as a pamphlet, flyer, or brochure, make sure you know exactly where the folds or binding will fall and that you leave a wide enough margin around these areas. You can mark these boundaries in your digital file to ensure that you leave enough negative space.
6. Check dimensions and resolution
Image quality and resolution is determined by DPI, not the file’s dimensions or size. A large file size does not necessarily mean your image is high resolution, and your printed product may still turn out grainy and pixelated.
If you’re designing for print, your design should be set to a minimum DPI of 300 to avoid loss of quality. For digital or web design, a DPI of 72 is sufficient.
Learn more about DPI.
7. Convert to CMYK color
All printed graphics should be set to CMYK color, not RGB. You won’t see any difference on your screen, but it will make a huge difference to your printed product. This is because your computer screen is configured to emit color on the digital RGB spectrum, while CMYK refers to the actual ink colors that will be used to print your design: cyan, magenta, yellow, and black.
Read more about CMYK and RGB color.
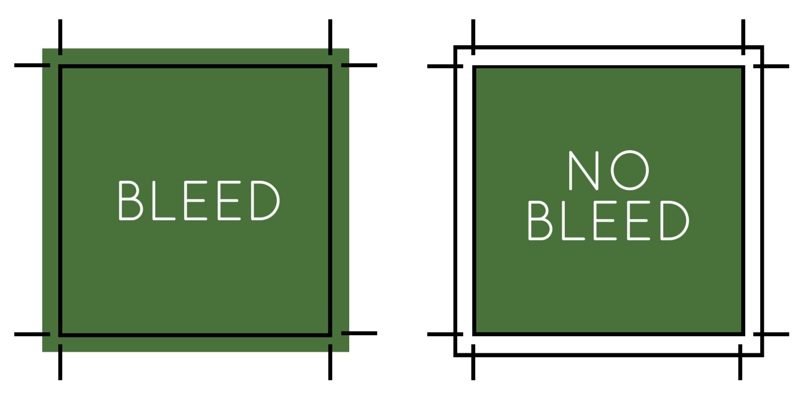
8. Add a bleed
Bleed allows for your design to flow to the edge of the page. You should always include a bleed if any element of your design will extend right to the edge of your printed paper.
Learn more about bleed.
9. Perfect your typography
Printed type looks different than it appears on screen. To ensure readability, you may need to add extra weight or increase the font size, especially if you’re using reversed type.
You may also wish to embed any special fonts in your design in case your printer doesn’t have them installed in their font library. This way, customized typefaces will function properly regardless of whether your printer has them installed, which will prevent unwanted font substitutions or delays in the printing process.
10. Use the proper file type
Before you submit your file, check with your printer to see what file type they prefer. If your printer has to convert your design to another file type, you may end up with unwelcome layout errors.
Many printers prefer PDFs, but may also accept high resolution JPEGs. Some printers also request native files along with a print-ready file so they can make edits or compare the printed product against the original.
Read our tips for choosing the right file type.
11. Print a proof
Always do a test print, called a “proof”, before you submit your print-ready file. A proof allows you to correct any errors you may have missed on screen before you start the printing process, and is particularly useful if your document contains multiple pages or folds. When you submit your file to your printer, submit your proof as well so they know exactly what you envision.
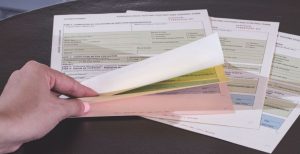
12. Think about paper
Different paper weights and finishes can significantly impact the look and feel of your final printed product. Some products also fold easier, which you should take into consideration if you’re creating a folded design like a flyer.
We can help you find the perfect paper for your project. Check out these resources:

Print Perfection
Follow these steps to make sure that your final printed project looks just like you envisioned. A bit of preparation can help you avoid unwanted and unwelcome printing errors and delays!
Get more graphic design tips: