Bleed – What Is It & Why Do You Need It?

It may sound a little menacing, but bleed is one of the most important aspects of graphic design. Incorporating bleed is one of the simplest ways to ensure that your printed design turns out perfect, so let’s jump right in.

What Is Bleed?

“Bleed” refers to extending your design beyond the borders of a printed page. Incorporating a bleed allows you to run your design right to the edge of a printed page, so its very important if your design elements or background color extend to the very edge of your design – the last thing you want is an unexpected white border.

It’s hard to modify bleed once your design is finished, so make sure you incorporate it before you get started. Modern design software makes it easy to add bleed as long as you know where to look. If you aren’t sure how much bleed to leave, contact your printer.

Why Do I Need Bleed?

When your design is printed on a press, it’s printed onto a large sheet and then trimmed down to size. The chance that a slight error will occur increases at each stage of the printing and binding process, and slight mechanical variations in printers can result in a white edge when you might not want one. If you extend the image beyond the final trim size using a bleed, you can easily avoid this common problem. Plus, bleed also helps you accommodate operator error.

Because paper is an organic material, it acts differently in different environments. Bleed allows you to compensate for slight variations in how different paper grades, finishes, and sizes behave. Understanding your chosen paper can help you avoid printing problems, but including bleed is the simplest way to prevent complications from the get-go.

How Much Bleed Should I Leave?

Page Creep
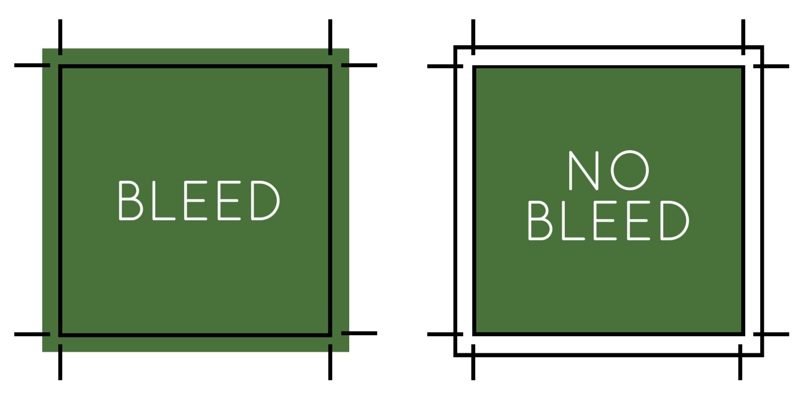
The amount of bleed you leave will ultimately depend on your design and what you’re printing on. Different papers behave differently, and different types of publications require more or less bleed. Take a book for example – when you fold pages to construct a book, the inner pages will start to poke out from the edge. This is called “creep” or “shingling”, and it can easily be avoided by incorporating a bleed and compensating for trimming that will occur after binding.

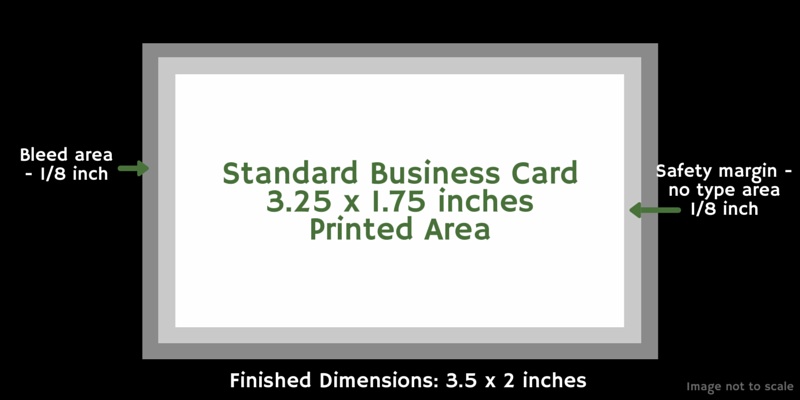
Standard bleed is 3 mm or 1/8 inch. Many printers prefer more bleed, especially for larger books, thicker paper, or jobs with multiple sections. If you aren’t sure how much bleed to leave, ask your printer.

No matter how much bleed you leave, be careful not to position your design elements too close to the edge of your printing margin. It can be difficult to properly position elements that extend beyond the edge of the page, and your design could ultimately end up looking sloppy and unprofessional. Instead, always keep your design inside the borders of the “safe design zone”.

How Do I Add Bleed?

Adding bleed is super easy if you do it before you start your design, but it differs for every program. Check out these guides:

How to Add Bleed in Adobe Photoshop, Illustrator, or InDesign

How to Add Bleed to a PDF

The Life Blood of Design

Bleed is a simple but integral aspect of any graphic design project. Not incorporating bleed can lead to poor printing, but now that you know what bleed is, why you need it, and how to add it, you can look forward to consistently well-printed designs.

Buy More Paper, Save More Dough

5% OFF $500+

with code 500SALE

Up to 25% OFF

with REWARDS

FREE SHIPPING

ORDERS OF $149+