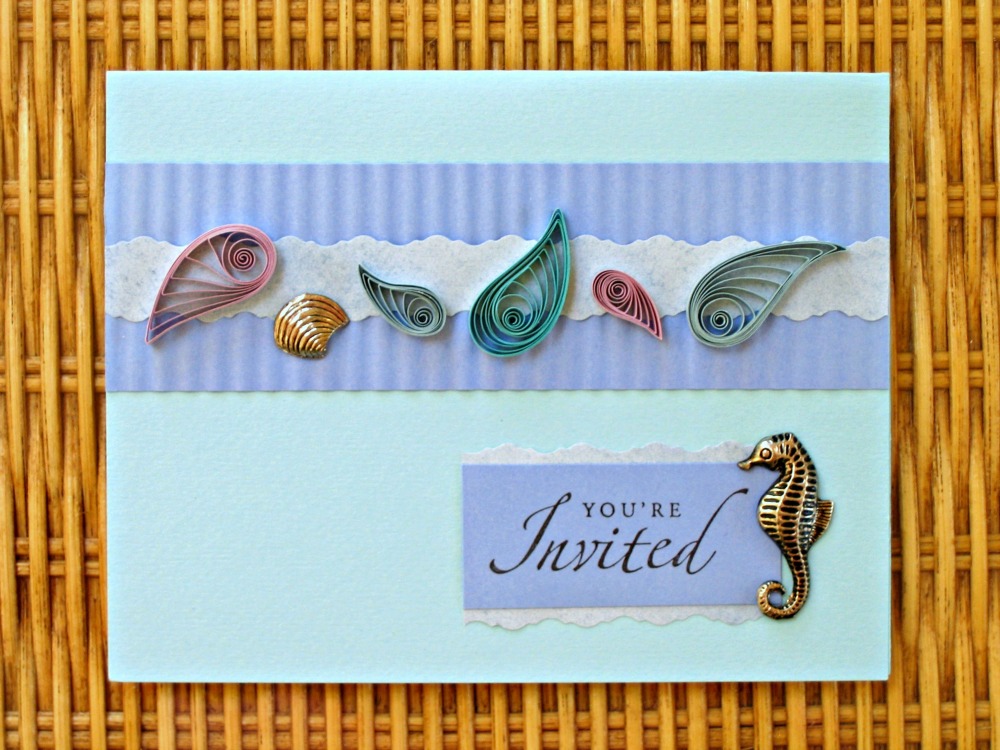
Here’s an invitation that will set the stage for a beach or pool party this summer, not to mention it’s a great way to try your hand at paper quilling. The curved shapes, reminiscent of nautilus shells, will wow recipients and are made by rolling and shaping strips of paper. There’s no need to shop for special quilling supplies because any stiff wire – a cake tester from your kitchen drawer or even a cocktail stick – will be fine as a substitute tool. Practice with strips cut from ordinary computer paper and once you’ve mastered the knack, move on to pearlized strips that will give your shells a pretty shine.
[su_spacer size=”10″]Supplies[su_spacer size=”10″]
[eltd_unordered_list style=”circle” animate=”no”]
- Card stock – light blue, medium blue
- Text weight paper – light blue
- Pearlized quilling paper – 1/8 inch, aqua, light green, lavender (or cut strips from sheets of Stardream text weight paper)
- Quilling tool
- Aleene’s Tacky Glue – for quilled coils
- Paper piercing tool or cocktail stick – to apply glue to quilled coils
- Double-stick tape or glue stick – to adhere card layers
- Scissors
- Ruler
- Tweezers
- Stamp – mine was from Stampin’ Up!
- Black ink pad
- Paper cutter with scoring blade
- Decorative edge scissors – waves or Victorian
- Paper crimper
- Metal charms – shell and seahorse (mine were from CustomQuilling.com. I’ve seen some on Etsy too.)
- Plastic lid or waxed paper – to use as glue palette
- Damp cloth – to keep fingers free of glue [/eltd_unordered_list]
 Instructions[su_spacer size=”10″]
- Cut an 8.5 x 5.5 inch piece of light blue card stock. Score at midpoint to make a top fold card.[su_spacer size=”10″]
- Cut and crimp a 6 x 1 5/8 inch piece of medium blue card stock. Adhere to card and trim excess at ends with scissors.[su_spacer size=”10″]
- Cut a 6 x 1 inch piece of light blue, text weight paper. Trim top and bottom edges with decorative scissors. The resulting piece should be about 5/8 inch wide. Adhere to center of crimped strip and trim excess.[su_spacer size=”10″]
- Stamp sentiment on medium blue card stock. Cut a 2 1/4 x 1 inch rectangle, centering the words. Cut two more light blue decorative edge strips and adhere to the rectangle’s long edges as shown. Adhere rectangle to card.[su_spacer size=”10″]
- To make the quilled shells: Make three 16-inch curved teardrops and two 8-inch curved teardrops in varied colors of pearlized paper.
 To make a curved teardrop, dampen fingers and place one end of paper strip across needle tool or substitute. Using the thumb and index finger of whichever hand feels most comfortable, roll paper around needle with even tension while holding the tool handle with your other hand. Be sure to roll the paper, not the tool.
 When the strip end is reached, allow the coil to relax and slide it off the tool.
 Pinch a point to create a teardrop. Trim excess paper at point and secure end with a very small amount of glue. Hold end in place for a moment to allow glue to dry. Grasp point between thumb and index finger and push gently to one side to make a curved teardrop shape.
- Spread a thin layer of glue on a non-stick surface. Holding curved teardrop with tweezers, lightly touch one side to glue, then place directly on card where desired. It’s best to not slide quilling into position as this will leave a shiny snail trail. Glue the remaining curved teardrops in place.
[su_spacer size=”10″]
- Lastly, apply glue to metal charms and adhere to card.
To mail your party invitations, regular envelopes should be fine as long as you used sturdy card stock. If not, slip an extra piece behind the invitation to prevent bending. Add a layer of bubble wrap over the quilling if you wish, but the densely rolled coils are surprisingly strong and should travel well. Check with your post office to determine if extra postage is required due to the weight of the charms.

Thanks to The Paper Mill Store for allowing me to share my love of quilling and card making! You’ll find many more quilling patterns and paper craft tutorials on my website, All Things Paper.


