Quilling has been around for hundreds of years, but I’d never heard of the rolled paper craft until a magazine article introduced me to the beautiful things that can be made with narrow strips of paper. I knew immediately that quilling was something I had to learn to do! Trust me on this… after a bit of practice, quilling becomes as relaxing and satisfying as knitting or crocheting, not to mention it allows your creativity to flourish. Coils and scrolls can be arranged in a limitless number of ways.
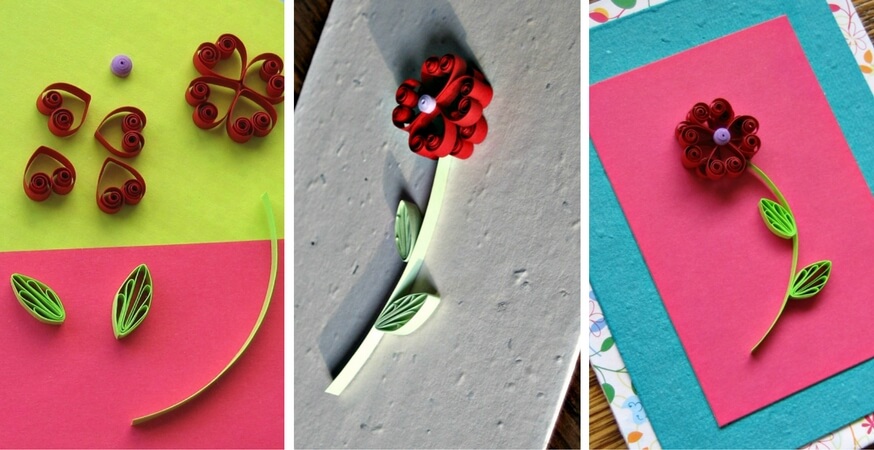
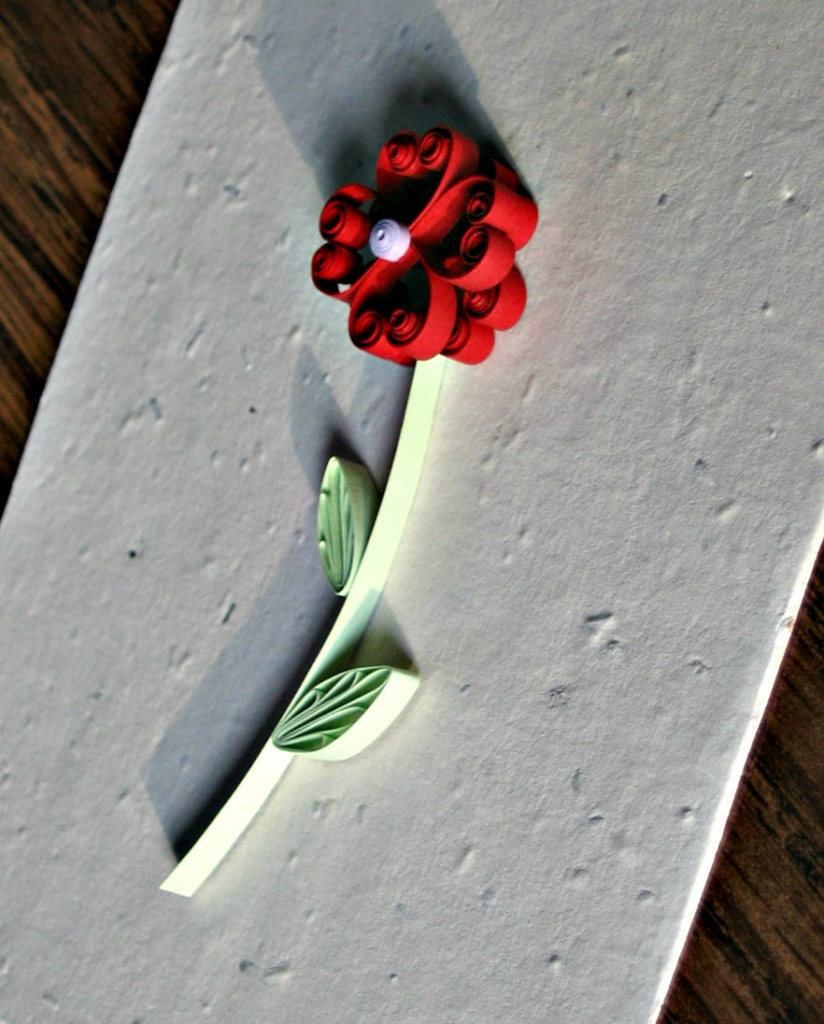
Try your hand at making this quilled flower card that is composed of heart-shaped scrolls as a starter project. I used textured paper for the card layers and added a message inside that says May your love bloom and grow! It could be sent as an engagement, wedding, or Valentine’s Day card.
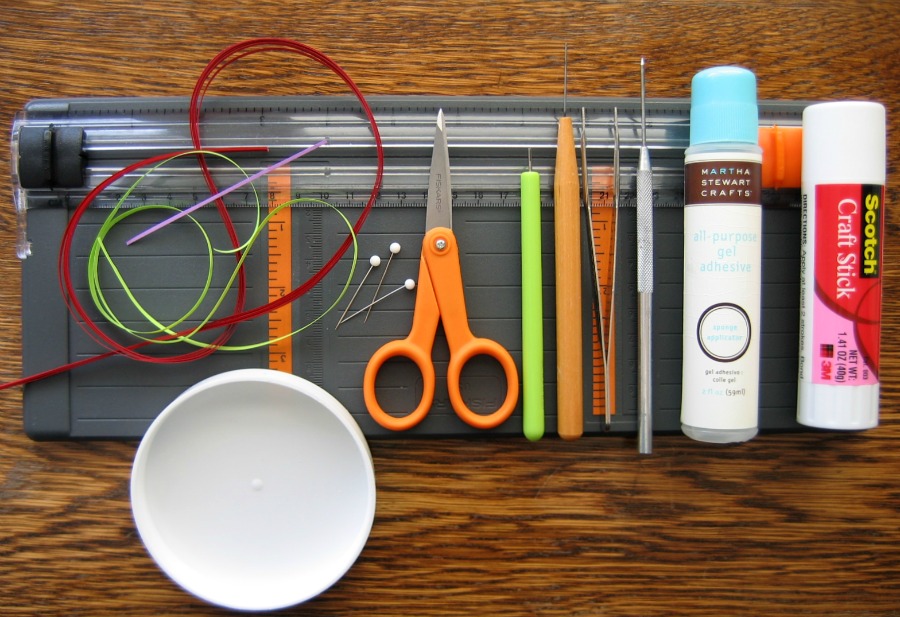
Very few supplies are needed to quill; you probably have most on hand or can make substitutions to get started right away.
Quilling Supplies
- Glue – suitable for paper
- Scissors – detail
- Ruler
- Tweezers
- Glass head pin or paper piercing tool or toothpick – to apply glue
- Plastic lid – use as glue palette
- Non-stick surface
- Damp cloth – to keep fingers free of glue
Card Making Supplies
- Card stock
- Layering papers
- Glue stick or double-sided adhesive
- Bone folder
- Paper trimmer with optional scoring blade
Quilling strips are slightly heavier than copy paper and are sold in single or multi-color packages containing 40-100 strips. Copy paper works fine for practice though… just cut a sheet into narrow strips with a paper trimmer.
There are two basic types of quilling tools – slotted or needle; the choice is a personal preference. A slotted tool is very easy to use, but leaves a tiny crimp in the center of a coil. While a needle tool is a little more difficult to master, the coils it creates will have perfectly round centers. Before purchasing one or the other, try a stiff wire, corsage pin, or even a cake tester from your kitchen drawer to get the feel of rolling paper.

To roll a coil with a slotted tool: Slide one end of a strip into the slot – the paper shouldn’t extend beyond it. Rotate the tool with one hand while evenly guiding the strip with the other hand.

To roll a coil with a needle tool: Hold the tool handle with one hand and dampen the thumb and index finger of the other hand. Place one end of the strip across the needle. Roll the paper around the needle between your thumb and finger, taking care to rotate the paper, not the tool. When the strip is fully rolled on either tool, release the coil and slip it off the tool (loose coil) or glue the end in place and then slip it off the tool (tight coil).
Tip: A torn strip end will blend in better than a cut end on a tight coil. The result will be a coil with a smooth edge and round appearance. When gluing quilling, use the smallest amount of glue possible and keep a damp cloth handy to wipe any stickiness from your fingers. I like to apply glue by dipping the tip of a glass head pin into a small dab I’ve placed on a non-stick surface. (I often use a plastic container lid.) A special glue bottle that has a very fine tip is another method that works well.

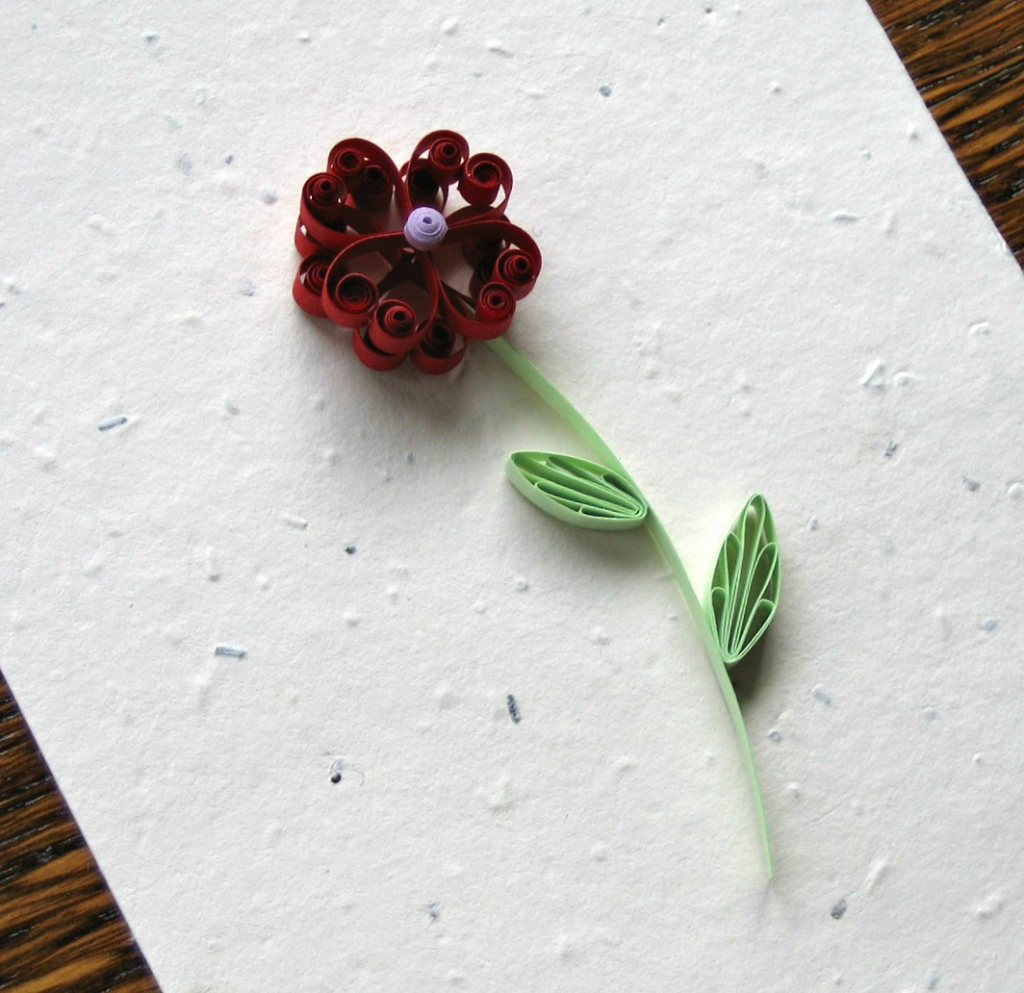
To create the flower shown here, you’ll need to make eight heart scrolls as the flower petals, one tight coil as the center, a stem, and two leaves.

Make a heart scroll
Fold a 3 inch red strip in half. Roll one end toward the fold, allow the coil to relax, and slip it off the tool. Repeat with the opposite end. Apply a tiny amount of glue with the tip of a pin where the top coils meet (make 8).
Make the flower center
Cut a 3 inch lavender strip in half along its length. Discard one of the strips and tear the very end of the other. Roll the strip and glue the torn end in place without allowing the coil to relax. Slip coil off tool. Press the ball of a glass head pin against one side of the tight coil to give it a domed top. Use the pin to apply a bit of glue inside the dome to preserve the curved shape. Make the stem: Glue two 2.5 inch green strips back-to-back. When the glue has dried, give the stem a slight curve by bending it around the quilling tool.
Make the large leaf
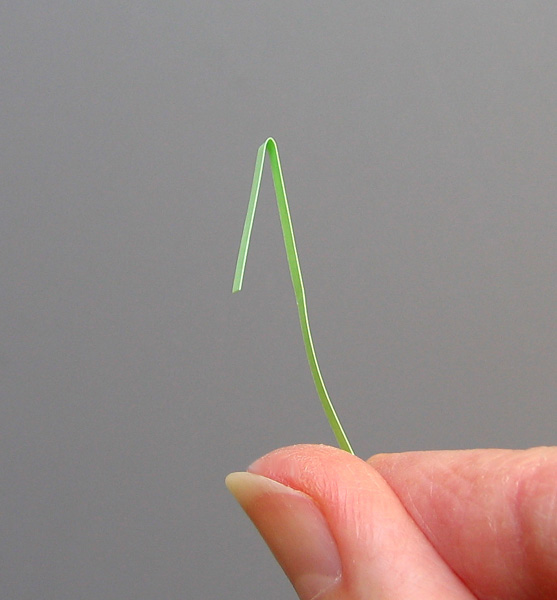
Begin by making a 1/2 inch fold at one end of a quilling strip.
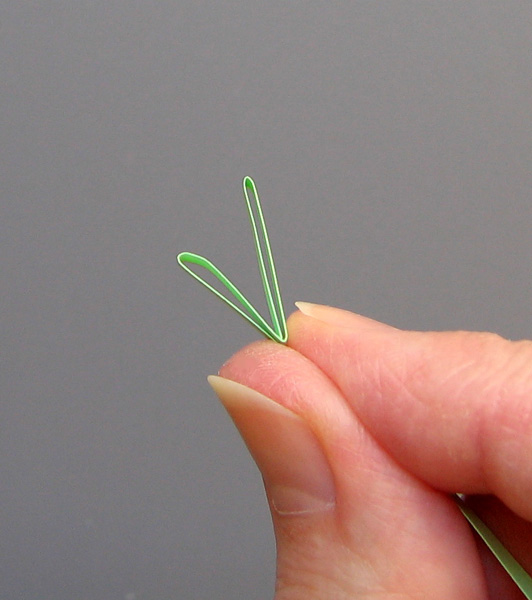
Next, using the same strip without cutting it, make a loop to the left of the fold that isn’t quite as tall as the fold.
Make a second loop, this one to the right of the fold.
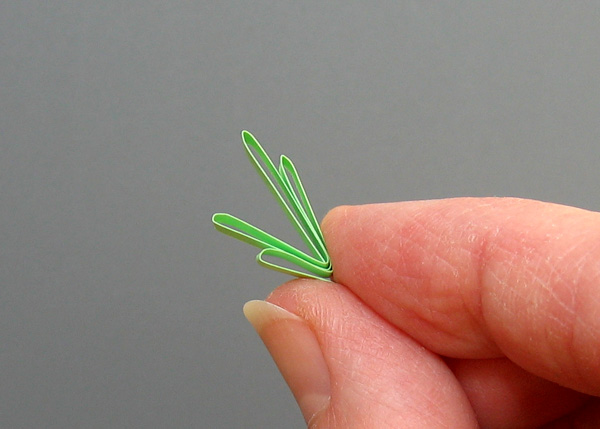
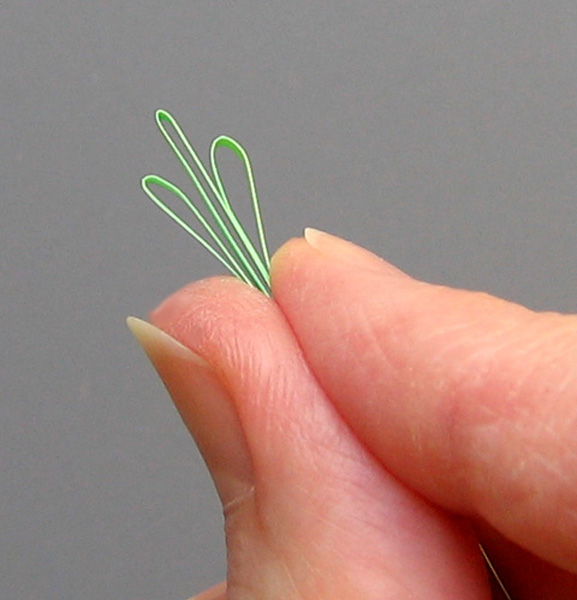
Make another pair of loops, not quite as tall as the first pair.
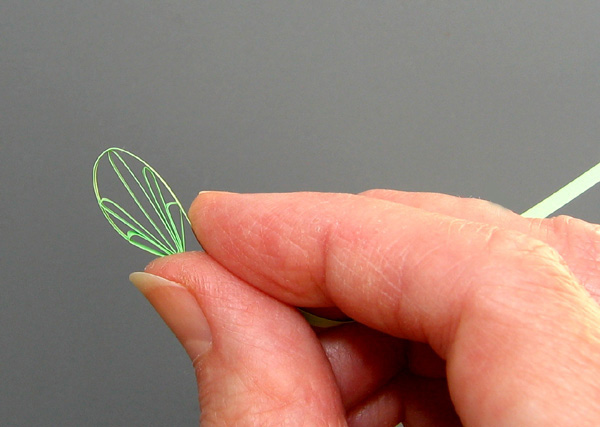
Encircle all of the loops with the same continuous strip to create a collar. Glue end in place at the bottom of the leaf and trim excess paper.
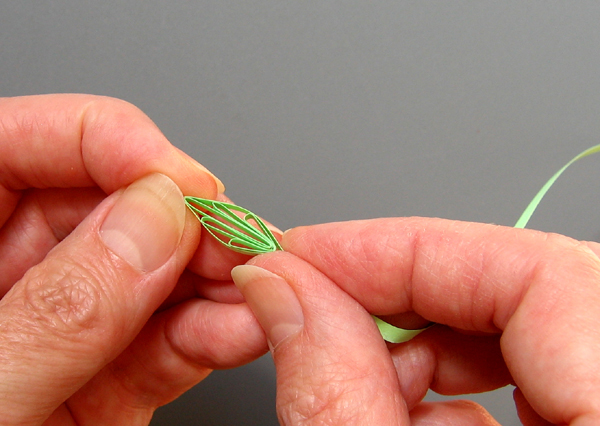
Gently pinch the tip.
Make the small leaf
Repeat the large leaf steps, but make the first fold 3/8 inch.
Assemble the flower on a non-stick surface
(Tweezers are invaluable here!)
- Make one layer of the flower by gluing four of the heart scrolls together, points facing inward. Make a second layer with the additional four heart scrolls. Again, be sure to apply just a tiny amount of glue with the tip of a pin; no glue should show once the scrolls are in place. Allow glue to dry for a few minutes.
- Spread a thin layer of glue on the non-stick surface and pick up one scroll layer with tweezers. Touch the underside of the layer to the glue and place the layer on top of the other layer, offsetting the heart scrolls slightly so they don’t directly overlap.
- Glue the flower center in the middle of the top layer.
- Glue one end of the stem between two of the hearts scrolls. Glue one leaf on each side of the stem with the large leaf in the lower position. When the glue has dried, glue the flower on a card or journal cover: Holding the flower gently with tweezers, touch the underside to the shallow layer of glue and place it directly where desired. Try not to slide the flower into position as that would leave a snail trail of glue.
To prepare a standard-size card: Cut an 8.5 x 11 inch sheet of card stock in half across the width. Use a bone folder or a paper trimmer’s scoring blade to crease one of these halves in half again. Fold card along scored line. This will result in a card that measures 4.25 x 5.5 inches. Layer additional papers on the front if desired, such as a lightweight patterned paper as shown here and two smaller card stock rectangles in graduated sizes on top of that. Use a glue stick or double-sided tape to adhere layers.
To mail a quilled card: Take a few precautions so your quilling (and spirits) won’t be crushed. Use a boxelope that is made to accommodate a dimensional card or place the card between two sheets of lightweight cardboard and place it inside a bubble wrap envelope.
I hope this will be the first of many quilled flowers you’ll make!
Additional quilled designs and other paper craft tutorials can be found on my blog All Things Paper.
by Ann Martin