Embossing is a great way to add texture and dimension to your scrapbook pages, homemade cards, or other paper crafts. There are many ways to go about embossing your designs, from using dedicated tools to creatively repurposing everyday items.
But before we get down into the nitty-gritty of embossing, let’s spend some time figuring out exactly what embossing is and exploring other embossing-specific terminology.
What is Embossing?
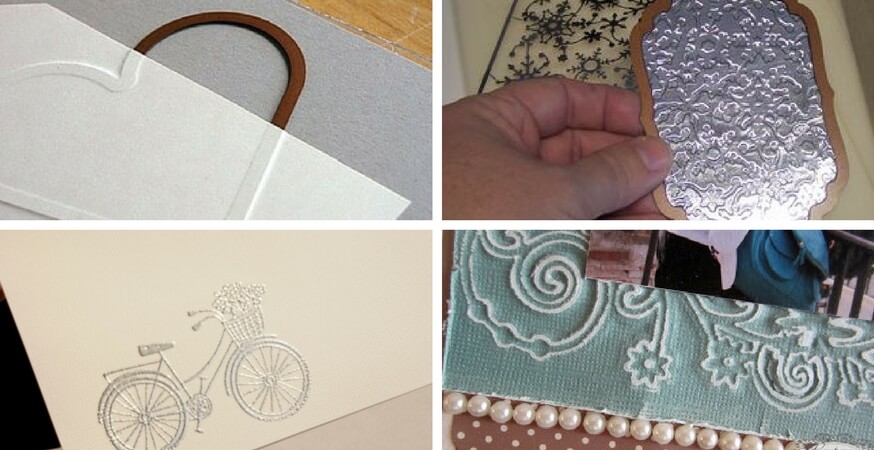
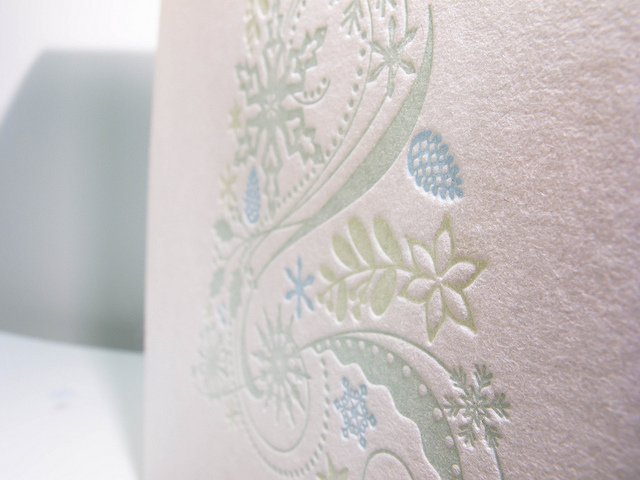
Embossing is a technique that raises a three-dimensional image on paper.
The two most common embossing methods involve either heat and powder, or a stencil and a stylus. We’ll talk about both of those methods a bit later.

Embossing Terminology
Embossing is easy, but there’s some lingo you should learn before you get started.
Chipboard – A light cardboard that can be used as a base for embossed patterns. Chipboard is similar to the thin cardboard used to make cereal boxes, and it’s a great material to use if you want to add some depth and texture to your paper crafts.
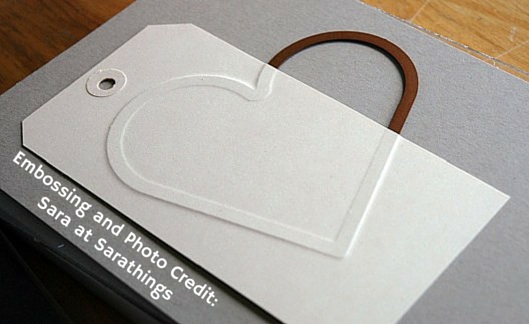
Dry Embossing – Also called “relief embossing”, dry embossing is done by tracing a stencil with a stylus in order to create a raised pattern.
Embossing Ink – A thick, slow-drying ink used in heat embossing.
Embossing Powder – A fast-melting powder often used in heat embossing. Embossing powder is sprinkled on a stamped design and melted using a heat gun to create a raised pattern.

Heat Embossing – An embossing technique that creates a raised pattern using a stamp, embossing ink, embossing powder, and a heat source.
Heat Gun – A tool that directs high heat to a small area without producing air. Used for melting embossing powder during heat embossing.
Sandwich – Not to be confused with an edible sandwich! Crafting sandwiches are used in die-cutting. They consist of a base, plate, shim, die, paper, and a cutting plate, and result in a die-cut.
Light Box – A back-lit frame with a translucent plastic face, used to transmit light through an image for the purpose of tracing. In embossing, it’s frequently used to view the stencil lines under the sheet of paper. You can also use a bright window.
Relief Embossing – See “Dry Embossing”.
Stencil – A template made by cutting a design into stiff paper, plastic, cardboard, or metal, commonly used in dry embossing. You can easily make your own stencil using a die-cutting machine.
Stylus – A pen-like instrument used often used in dry embossing.
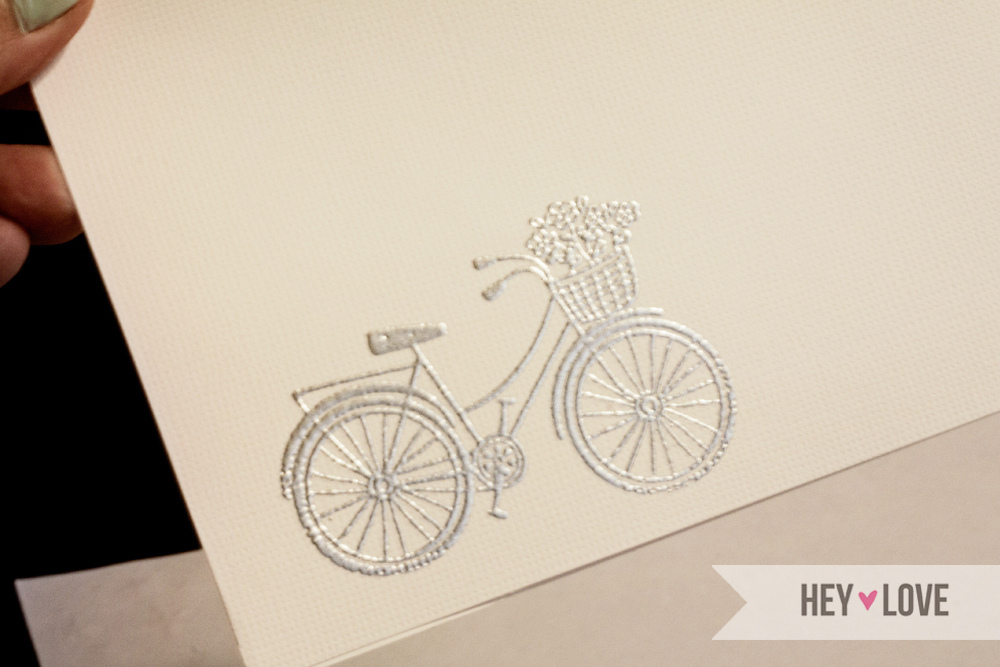
1. Heat Embossing
Heat embossing is one of the most common embossing methods. It creates a beautiful, colorful raised pattern and is a great alternative to rubber stamping.
Heat embossing requires a few items a novice embosser might not have in their craft supply stash.
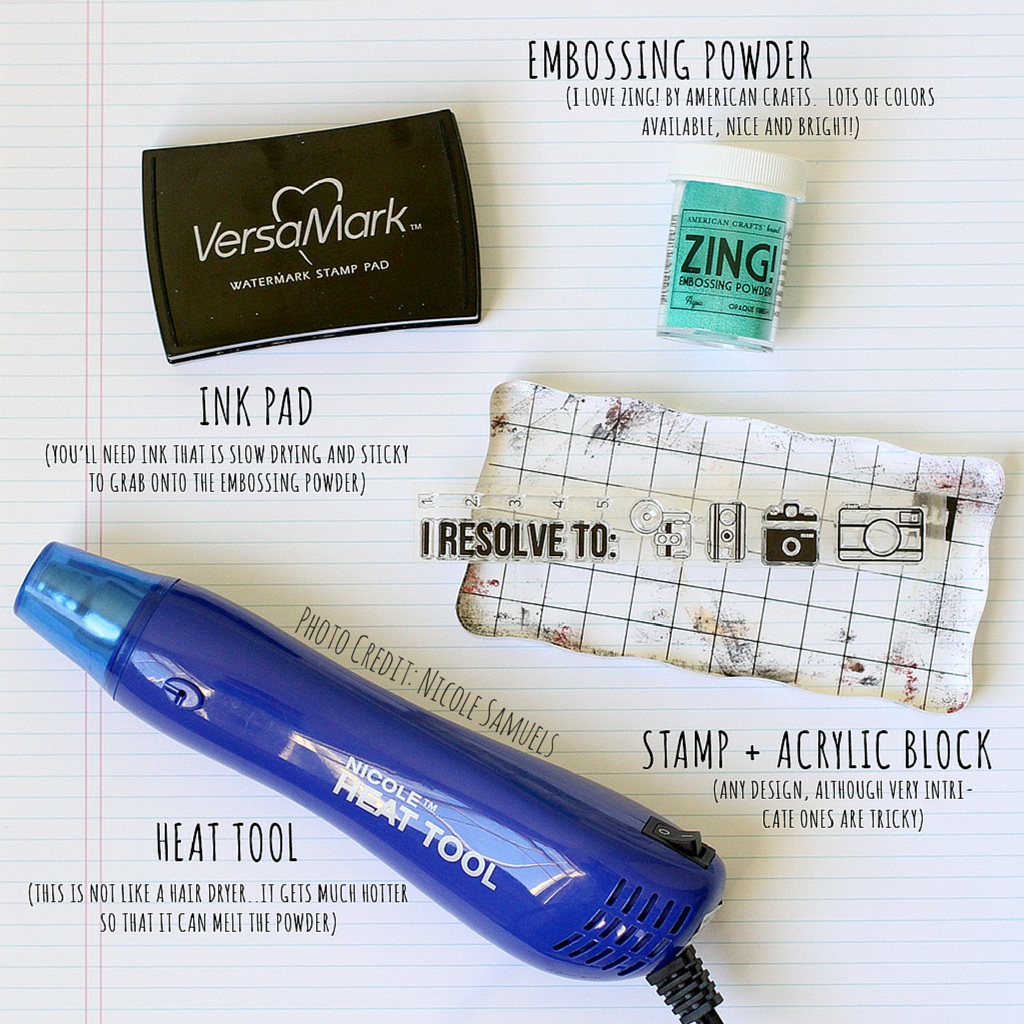
You’ll need:
- Embossing powder
- Embossing ink – it’s slow drying and sticky enough to hold the embossing powder
- A stamp and an acrylic block – you can use any design!
- Heat gun – Don’t be tempted to try using a blow dryer! Heat guns don’t blow out air – they only blow out heat (so your powder doesn’t go all over the place), and they get much hotter.
Heat embossing is super easy. Just follow these steps:
- Stamp your image using your embossing ink.
- Sprinkle some embossing powder over your stamped image.
- Tap off the excess powder.
- Use your heat gun to melt the embossing powder.
- Heat embossing super easy, but it’ll make your paper project look professional and luxurious.
2. Dry Embossing
Dry embossing only requires a stencil and a stylus, so it’s perfect for a novice embosser. You can even dry emboss using only a stencil and a safety pin.
Discover whether you enjoy the look and feel of embossed designs by dry embossing your next project – then, if you like it, you can invest in the tools and supplies required for heat embossing.
Follow these steps for dry embossing:
1. Use tape to secure your stencil to your light box or a bright window. Stencils with deeper grooves tend to work better. The side of the stencil you see facing up should be the reverse of what you want to see on your finished design.
2. Position your paper over your stencil and tape the corners. Cardstock and vellum work best because thinner paper may tear easily. Try rubbing wax paper over your paper surface to help the stylus glide easier.
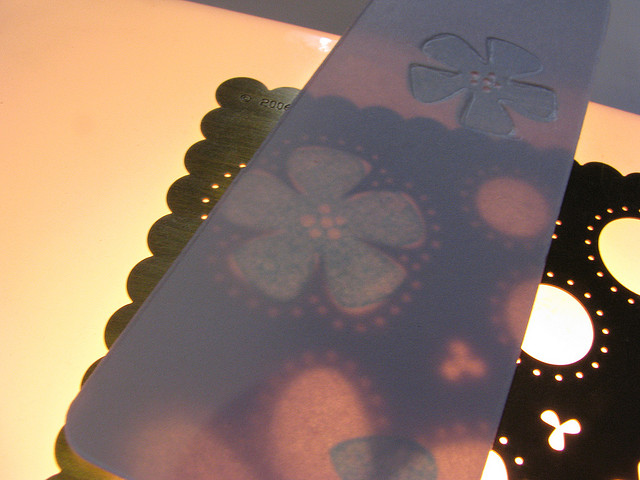
3. Trace around the edges of your stencil using your stylus. Press firmly, but be careful not to tear your paper.
4. Lift your paper off your stencil and check out your beautiful design! Try experimenting with painting your design, applying glitter, or whatever colorful embellishment tickles your fancy.
We recommend using a light-medium weight cardstock for dry embossing, such as a 65 lb. or 80 lb. cover-weight stock.
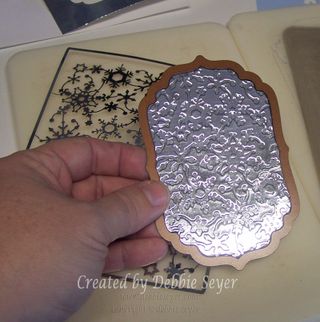
3. Foil Embossing
Foil embossing is basically exactly what it sounds like – an embossed foil pattern. You can achieve this luxe look by simply adhering aluminum foil to cardstock and embossing it using a die cut.
Foil embossing is a bit more labor-intensive, but the results can be stunning. This tutorial by Debbie Seyer is a great resource if you want to experiment with foil embossing.
To achieve a quicker and easier metallic look, check out our selection of metallic cardstock.
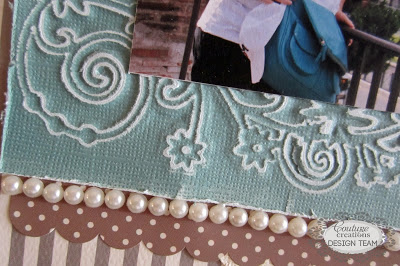
4. Using Die Cutting Plates
Remember when we talked about a “sandwich”? This is where you would use a crafting sandwich to emboss your designs.
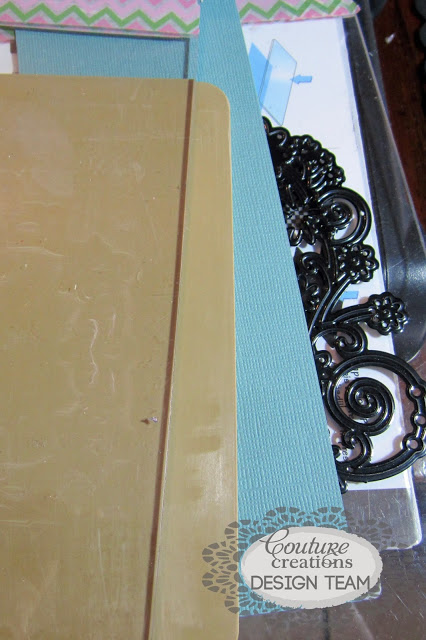
Simply take your embossing sandwich and layer the inside with an acrylic plate and cardstock, with the decorative die blade side up. Then run it through your die cutting machine, and voila – you have an embossed pattern!
Here’s an in-depth tutorial to get you started.
This style of embossing looks great with both textured and smooth papers. Try using a Felt finish – you can see our selection of felt papers here.
What About Debossing?
Debossing is basically the opposite of embossing. Instead of creating a raised pattern, debossing creates an indented pattern. Debossing is commonly used in graphic and print design.
If you want to incorporate some debossing into your paper crafts, all you have to do is flip over your embossed designs! Just make sure your stencil or die cut is facing the right direction.
Here’s a cool inking technique – it’ll take your debossing to the next level.
For a smooth look with just a hint of texture, try using a vellum finished paper.
Like a Boss
Embossing adds interesting texture to your paper crafts and can make any amateur crafting project look polished and professional. It’s a simple way to add a new visual element to your design without worrying about incorporating new colors, patterns, or embellishments. And with a little bit of practice, you can emboss like a boss too!
Sources
Anne-Laure. “The Embossed Design.” HowTo. December 3, 2013.
“Embossing Glossary“. About.com.
Gurney, Kerrie. “Visiting the Colosseum by Kerrie Gurney.” Couture Creations. October 21, 2013.
Nguyen, Michelle. “Get Crafty! Heat Embossing.” Hey Love Designs. April 11, 2011.
Samuels, Nicole. “Using Embossing Powders: A Tutorial and Some Tips.” Nicole Samuels. December 27, 2013.
Sara. “Tuesday Techniques – Dry Embossing with Wafer Thin Dies.” Sarathings. May 29, 2012.
Seyer, Debbie. “Foil Embossing Tutorial.” A Peek Into My Stamping Room. December 19, 2009.